
Best Camera Settings and Tips for Smoke Bomb Photography

Whether you’re interested in smoke bomb photography, or just bought your first bundle and are researching all there is to know, it’s important to know the basics before you start shooting. One important aspect is your camera's settings! You won't have much time once you set off your smoke bomb, so save some time (and stress!) and figure out your camera settings beforehand. Keep reading for some camera setting tips and tricks for your next photoshoot!

Before the shoot: Safety and Weather Check
Before you start shooting, make sure to review the proper smoke bomb safety protocols. Smoke bombs can be very fun to use, and can create some beautiful photos, but can turn into a safety hazard if not used properly. Here at Smoke Effect, our customer’s safety is one of our top priorities. That’s why we’ve answered questions like Are Smoke Bombs Safe?, Are Smoke Bombs Bad for the Environment? And Other Safety Tips. For more safety tips, please refer to our FAQ page.
Another important aspect of smoke bomb photography is the weather. Make sure to check the weather in the area you’ll be shooting before you go. Windy conditions are not ideal for smoke bomb photography, as you won’t be able to control the smoke and it will blow away from your subject. Additionally, avoid shooting at night or towards the evening, as the smoke will show up better if you are in a bright environment.
Camera Settings:
Shutter Speed
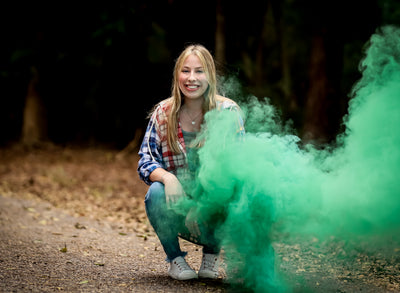
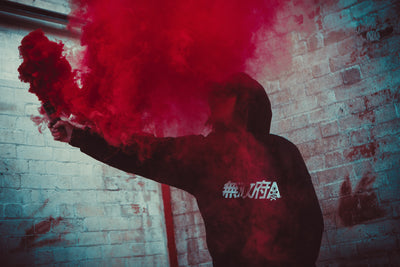
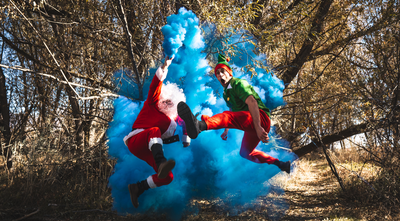
When shooting with smoke bombs, you first want to determine how you want the smoke to appear in your photos. This is mostly determined by your shutter speed. Shutter speed determines how long of an exposure your photo will have, or the amount of light your camera takes in. If you want smoke that’s sharp, clearly defined, and dramatic, you’ll want to go with a fast shutter speed. However, if you want smoke that’s soft and wispy with a smoother look, try using a slow shutter speed.
For the rest of this article, it will be assumed that you’re using a faster shutter speed, as that’s what we typically see people use when shooting with our smoke bombs.
ISO
Once you’ve got your shutter speed figured out, you can adjust your other settings accordingly. A faster shutter speed will lower the exposure in your image, so you’ll want to make sure you slowly increase your ISO until you’re happy with the final lighting. ISO indicates how sensitive your camera sensor is to light, which will bring more light into your picture. It’s good to be cognizant of your ISO when taking smoke photography pictures, especially with having such a fast shutter speed. If you’re unsure about what ISO to use, it’s always helpful to refer to the Exposure Triangle-

Aperture
Finally, you’ll want to adjust your aperture. Your aperture determines how big your camera lens opening, or your “lens pupil” as stated above, will be when taking your picture. Aperture is defined by it’s “f-stops”, meaning that a higher f-stop leads to a smaller lens pupil, and less light let into your photo. If you want to adjust your aperture manually, refer to The Exposure Triangle and experiment with what aperture looks best. If you want to have an automatic aperture, you can set your aperture to “automatic” or shoot in A or Av.
-
Now, you and your camera are ready for some amazing smoke bomb photography! Looking for more tips? Head over to our Taking Pictures with Smoke Bombs blog post, or go to our Instagram where we share weekly tips!